- Never oil hand tools! Lubricate if needed by running a candle along the blade.
- Remember - measure twice, cut once
- Blunt tools are dangerous - you risk more damage to the tool, your projects and yourself!
- Planer blades and the Narex chisels are to be sharpened to a 25° primary bevel and 30° secondary bevel. A tool page outlining this process is to be created. Please ask an experienced member to oversee your first sharpening of these tools using this process.
This page contains more information than is covered in the Basic Wood Shop (L1) induction. While all of the information written here is useful, this part of the basic induction will consist of:
- The location and use of marking tools (knife, marking gauge)
- The location and use of rulers and squares
- Verbal introduction to the types of saws we have and their use - western vs. Japanese (push vs pull stroke), as well as the set of saw teeth the relation to cross and rip cuts.
- Practical example of the use of the Japanese saw (as these are much easier to break), along with use of the square and marking knife. Inductor to watch for inductees pinching the blade, and offer instruction on how to cut a straight line on a piece of scrap.
- Verbal introduction to the use of the chisels - where they are, proper use. Difference between hammers and mallets. The importance of sharpness, and the description of the sharpening technique used at SLMS for the Narex chisels.
- Practical example of chiseling out a small rebate from a piece of scrap using a marking gauge and square. Inductor to watch for safe usage of the chisel, inductees not slamming the chisels with the mallet.
- Verbal introduction tho the use of the hand plane, demonstration of removing and setting the blade, and demonstration of planing. Reiterating the space rule on sharpening.
- Practical example of taking a few passes with the hand plane.
Stanley Knife

- Can have a fixed blade - when not in use this should be embedded in a piece of cork for safety
- Can have a retractable blade which slides back into the body
- If you change the blade, dispose of the old blade in the stanley disposal unit next to the single door to the front room. New blades are in the top half of the unit.
- Dispose of any other sharp blades by wrapping them in tape and then putting in general waste.
- If you use a stanley knife to firmly mark the line of a saw cut, then this will keep the edge of the cut much neater and less frayed.
Set square

-
These are used to help you mark a perfect right-angle
-
They are very precious - handle carefully and do not drop or damage.
-
Note - the space has two entirely metal set squares. These are extremely precious and are only used for checking the other set squares. You shouldn’t need to use them - stick to the wooden-handled ones!
-
How to use:
-
Mark a point on the edge where you need to cut
-
Press the thicker handle firmly against the flat edge, and line the metal arm up with the mark.
-
You can now use a pencil or blade to mark your right angle for cutting!
-
If you think it isn’t quite square you can check two ways
A. Use the metal ones to check against
B. Use on an edge that you know is straight and draw a line at a right angle from both directions. It should be the same, if not, it’s not square! (see here for a video explaining this)
Saws
What type of saws do we have?
Most of our saws are European, meaning they cut on the push stroke, but not when you pull back
-
Hand saw
- The classic long, tapering saw
- This is a good all-rounder, but not the most precise tool
-
Tenon saw
- Rectangular blade
- Blade tends to be shorter, firmer, and better for making precise, straight cuts where precision is more important
-
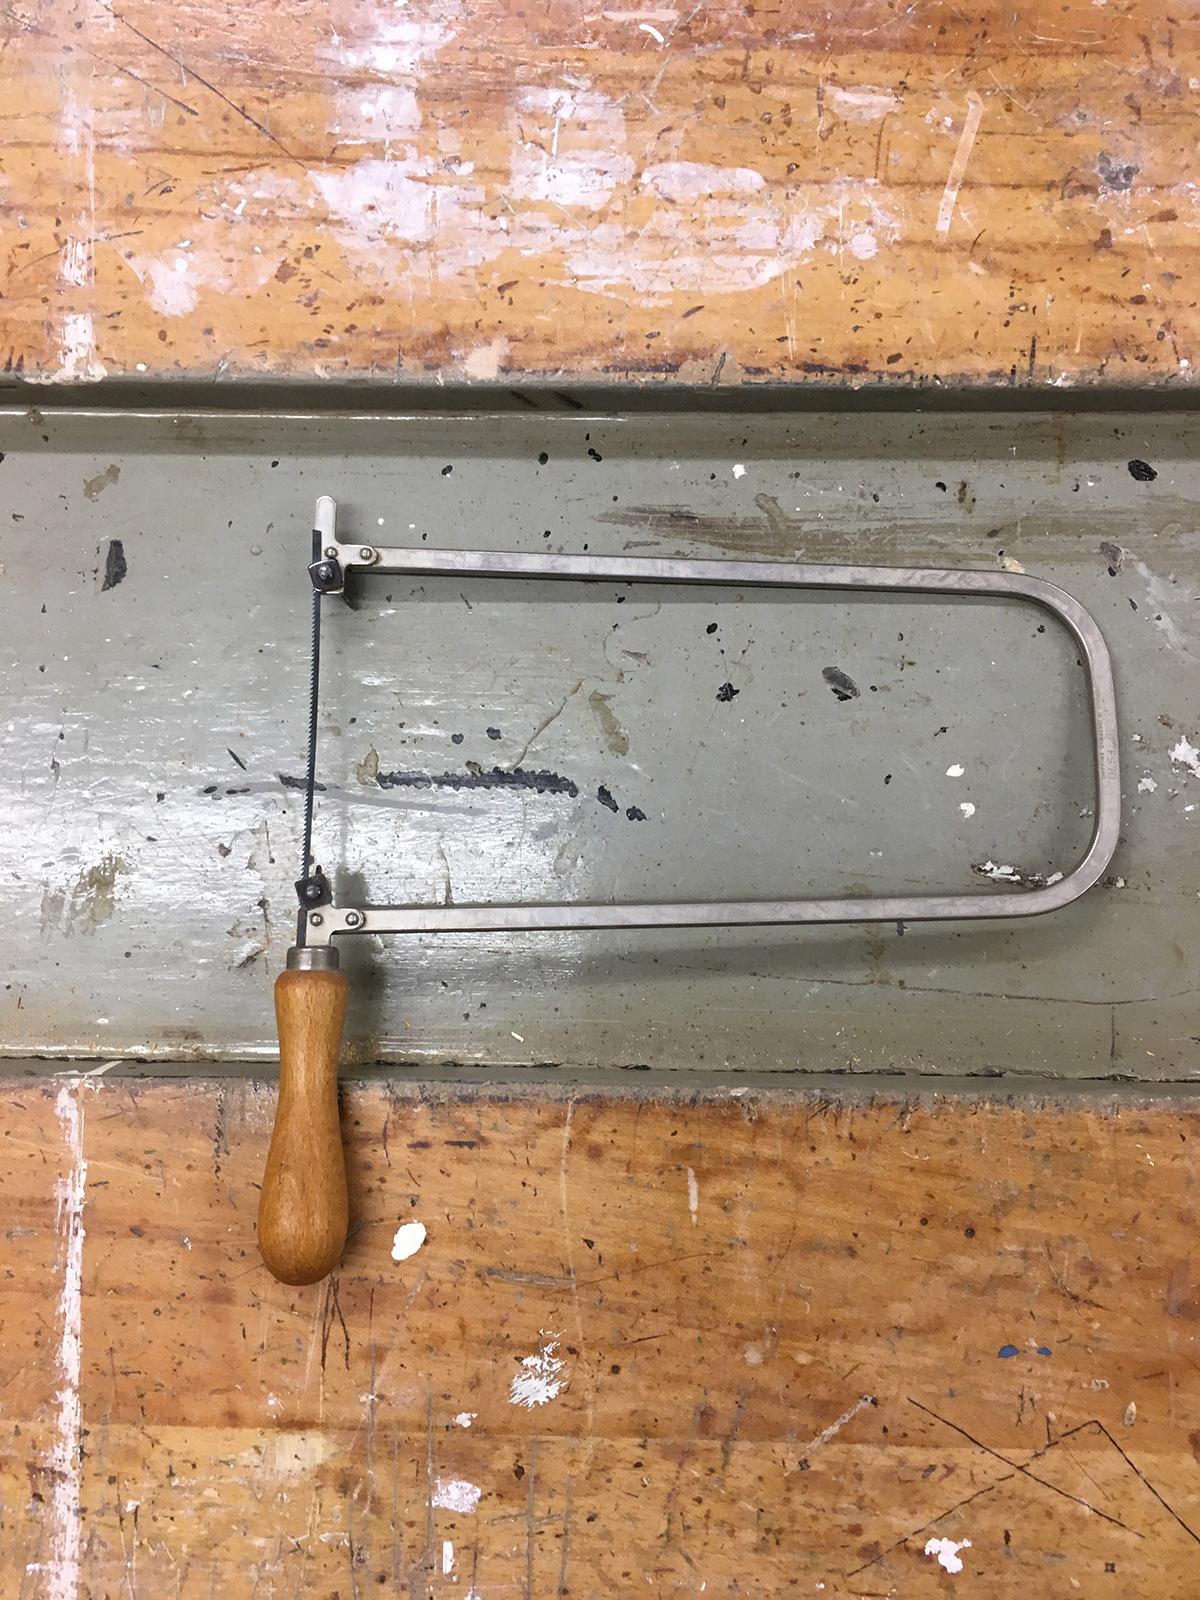
Coping saw
- Can be used for very precise or curved cuts
- Removable blade means you can to cut a section from inside a piece of wood by drilling a hole, threading the blade through, and re-attaching to the saw.
- Narrower blade are better for tighter corners, whereas deeper blades help you keep a straighter line
-
Japanese Saws
These cut on the pull stroke. Great for very precise fine work.
Set
- Look along the teeth of your saw - they are angled from side-to-side a certain amount - the amount/style of the angling is called the “set”.
- The wider the set (the more pointy-out-sideways the teeth), the more easily the saw can clear out the particles of wood as it cuts through. This can make it quicker and easier, but give you a rougher finish.
- The narrower the set, the less easily the saw will remove particles - you may need to clear out by pausing and blowing - but you’ll get a cleaner finish.
- Having more, smaller teeth per inch along the blade will also make your cut neater, but again the teeth will find it harder to clear particles
Crosscut vs. Ripcut
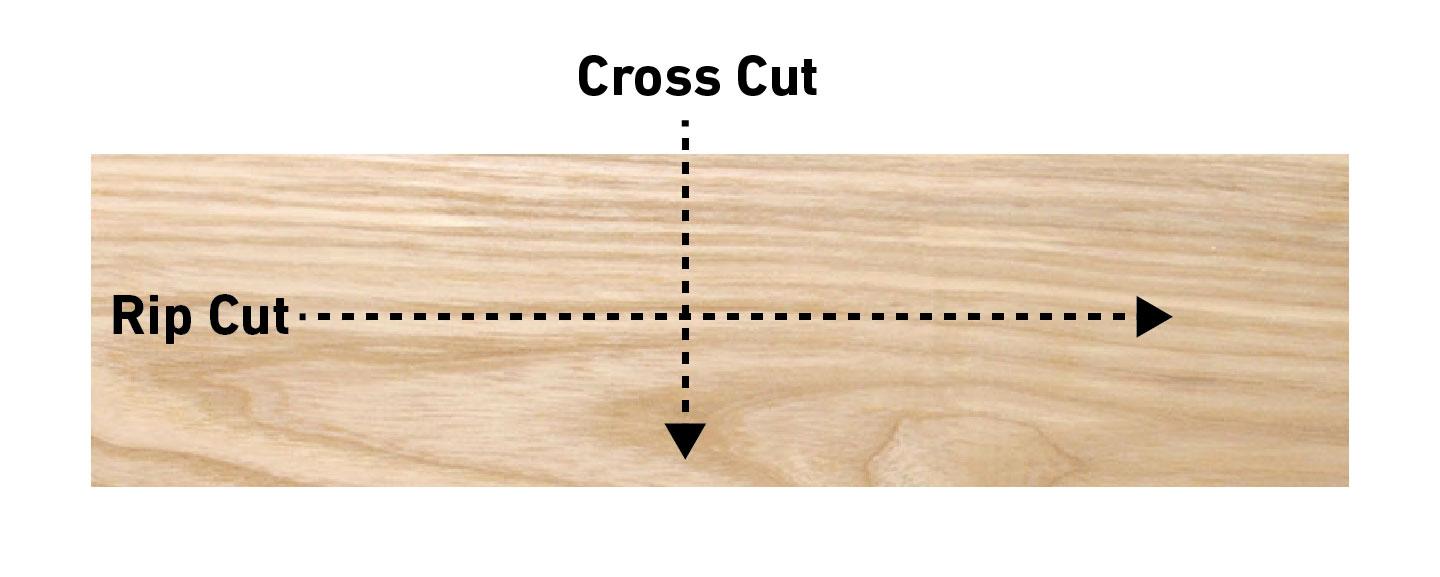
- Rip cut = a cut along the grain of the wood.
- Cross cut = a cut across the grain of the wood.
- Remember that wood is a very compact mass of stringy fibres, all running in the same direction - this is the grain - when the tree was living wood, moisture flowed up these fibres from the roots out to the leaves
- Look closely at the teeth on your saw - the front edge, that is cutting into the wood - it should either be flat, or bevelled alternately from side to side
- If a flat edge is cutting into the wood, a bit like a series of tiny chisels, then it is a Rip cut saw. This means it is designed to cut quickly along the grain, mostly pushing *between *the fibres, and tearing out a thin passage. It will give a very messy finish if you cut across the grain, as it doesn’t cut *through *the fibres very well.
- If a bevelled edge is cutting into the wood, then it is a Cross cut saw. The bevels act like a series of tiny knives, neatly doing the hard work of cutting *through *the wood fibres. This means it gives a very neat finish when going across the grain, but as it’s therefore less efficient at tearing out material - so if you cut along the grain it will work fine, but take you a lot longer than a rip saw!
- Some saws have special teeth designs to make them good at cutting both ways
Some of our saws look fancier than others…
Most of the space saws fall into one of two categories:
-
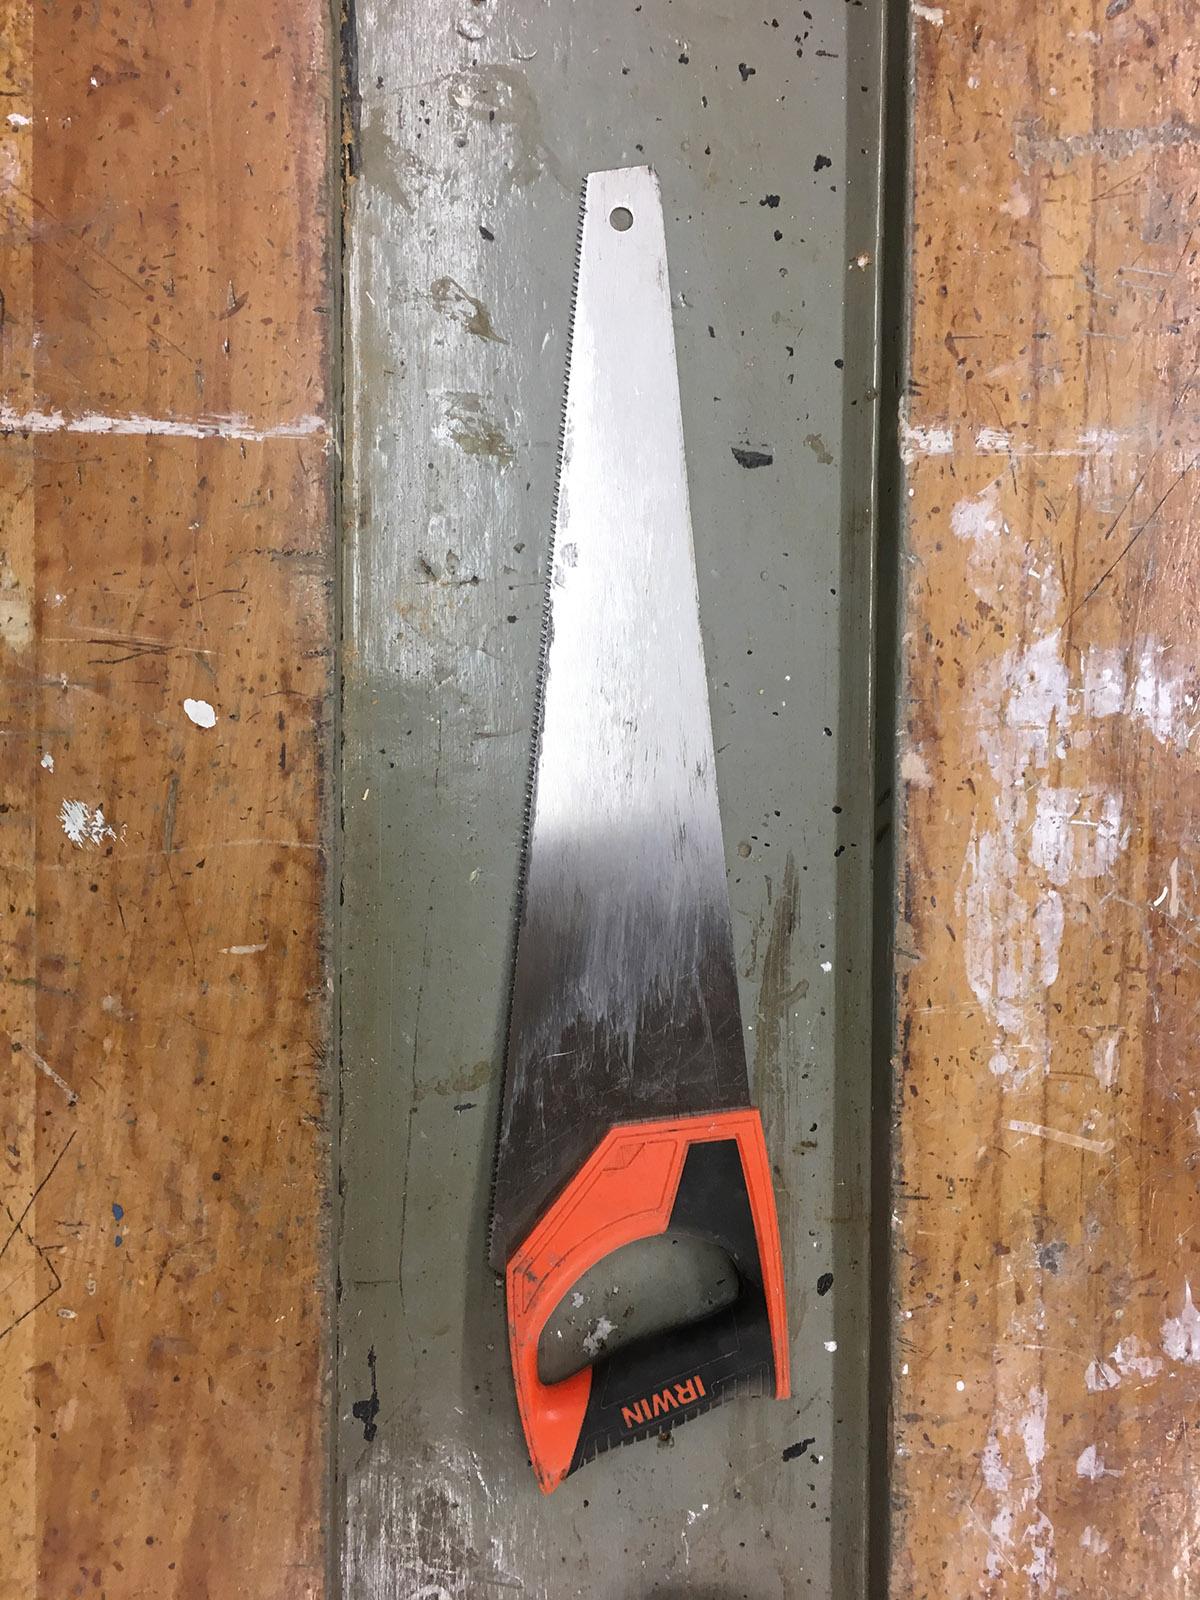
Plastic-handled hard-point saws
-
Have hardened teeth, which are very sharp when new, but can’t be sharpened, so gradually wear with use until the saw is no longer usable
-
Can be used on any sort of wood - including MDF, chipboard, second-hand wood and just before the end of their life, plasterboard. However, the sharpest saws shouldn’t be used on the more abrasive materials, use a more worn one for MDF and plasterboard.
-
Relatively cheap
-
These are the best saws for beginners
-
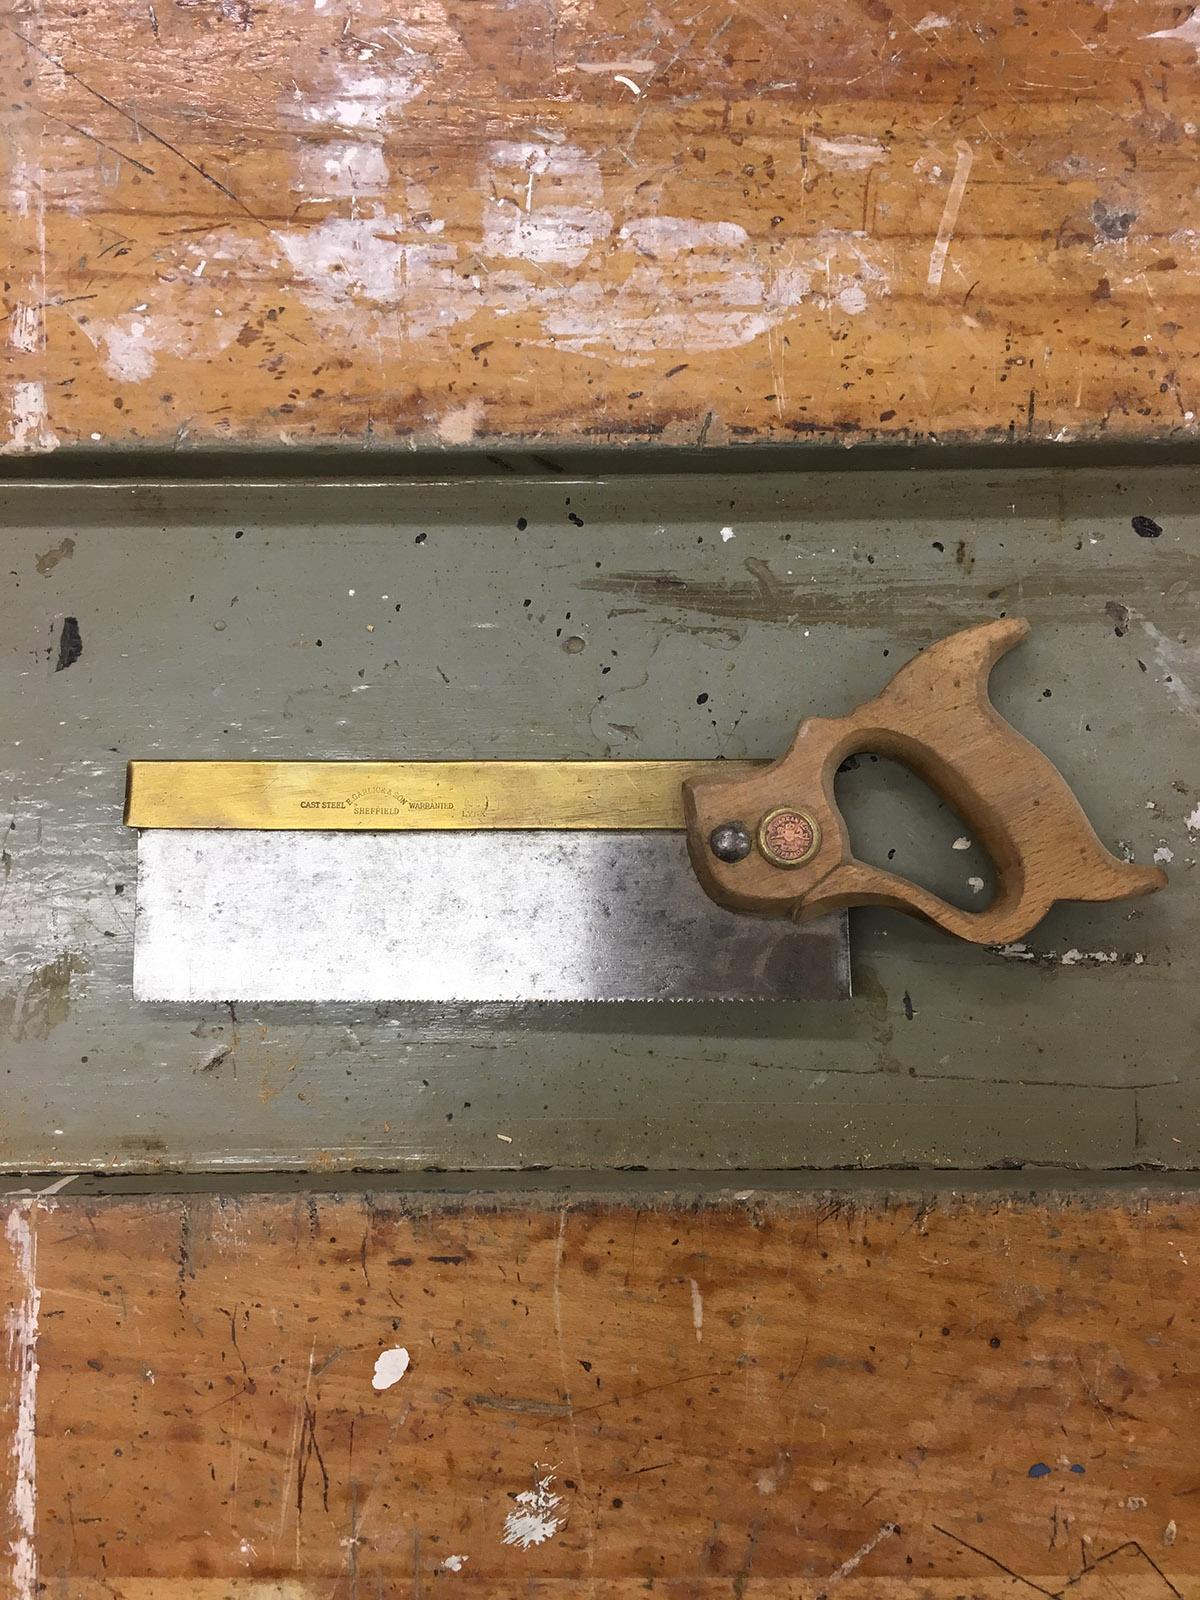
Boxwood handled re-sharpenable steel saws
-
These have softer steel teeth - which means they are re-sharpenable, but also easier to blunt (especially through mis-use). They a much more solid, high-quality construction, so they are better for very precise, professional carpentry and cabinet making.
-
Should not be used on MDF, as it is an abrasive material and will quickly blunt the saw.
-
These are a valuable professionals tool which can last a lifetime
-
As a beginner, you won’t need these! When you’ve got some experience, ask a woodtech to show you how to use them properly,

How to use:
- Make sure your material is securely clamped or held in a bench hook
- Mark the full length of your cut - if you don’t need to go all the way through your material, remember to mark the depth you need to cut to.
- Using a stanley knife to mark your cut.
- Stand with your feet shoulder width apart, looking in the direction you want to cut.
- Hold the saw with you index finger pointing down the blade
- Place the teeth nearest the handle of the saw on your mark, at a corner/edge
- Use your non-sawing hand to hold the material firmly, with the heel of your hand against the blade, to help hold it in place as you start
- Make sure your elbow is loose and straight, so the saw is like an extension of your forearm. You want to keep your forearm moving smoothly in a straight line.
- Make an initial short, slow, backward stroke - just a few inches. Put the saw back to your starting position, and repeat a few times to make a small initial opening in the material, enough to guide the blade.
- Now move your non-sawing hand an inch or so further away from the cut
- Begin making longer, smooth strokes - remember that your saw cuts properly when you push, not when you pull
Using a Mitre Box
- A mitre box is used to cut at specific angles - usually 0, 30, 45 and 60 degrees.
- Place your piece in the box and clamp, hold to box as necessary.
- Place the saw through the appropriate angled slots
- Start sawing, making sure you don’t pull the end of the saw out of the mitre box wall.
- As you get close to the bottom of the mitre box, remove your work from the box so not to damage it - you will have essentially created enough of your own mitre cut in the wood to finish off accurately.
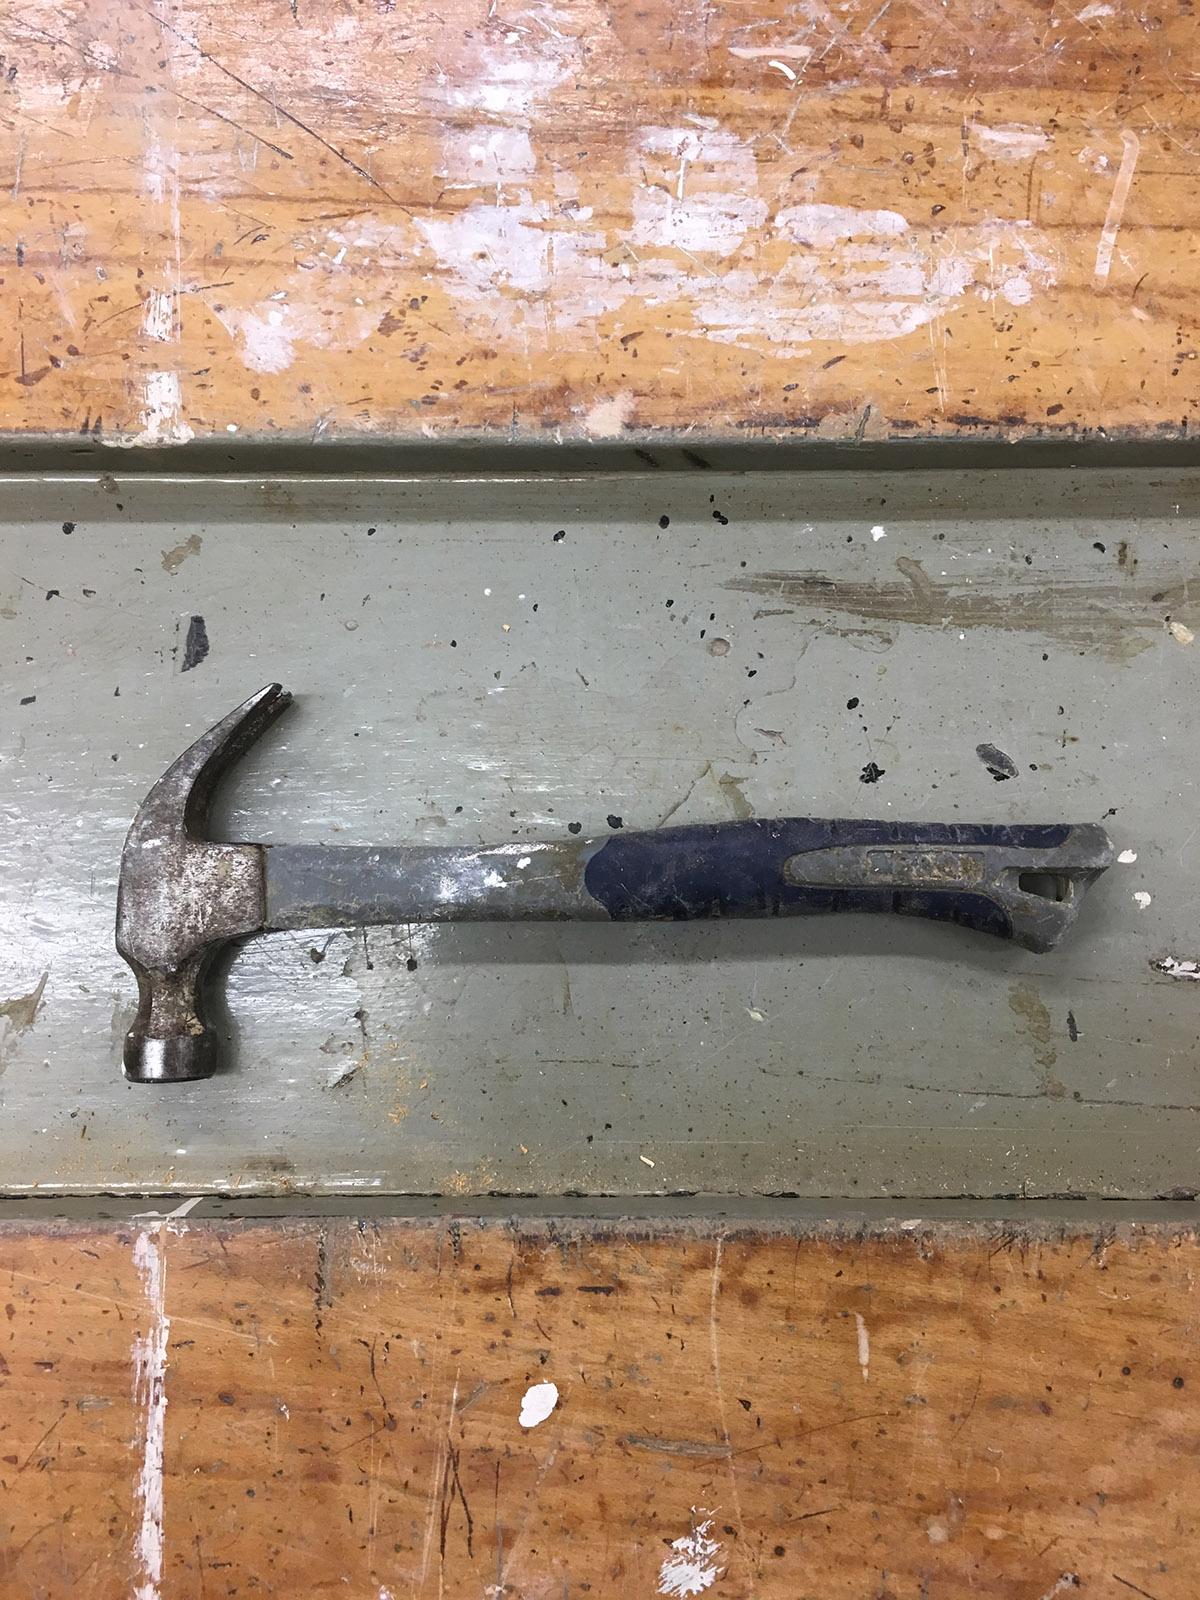
Hammers and Mallets
What’s the difference?
-
Hammer
-
Has a metal head
-
Has very few applications in woodworking - the main one being to use the back of a claw hammer (two claws which meet at a point near the shaft) to lever nails from reclaimed wood
-
Should not be used to hit another tool for any reason - you have been warned
-
Mallet
-
Has a rubber or wooden head
-
These are used for striking chisels and for moving pieces of a project into place

Chisels and Gouges
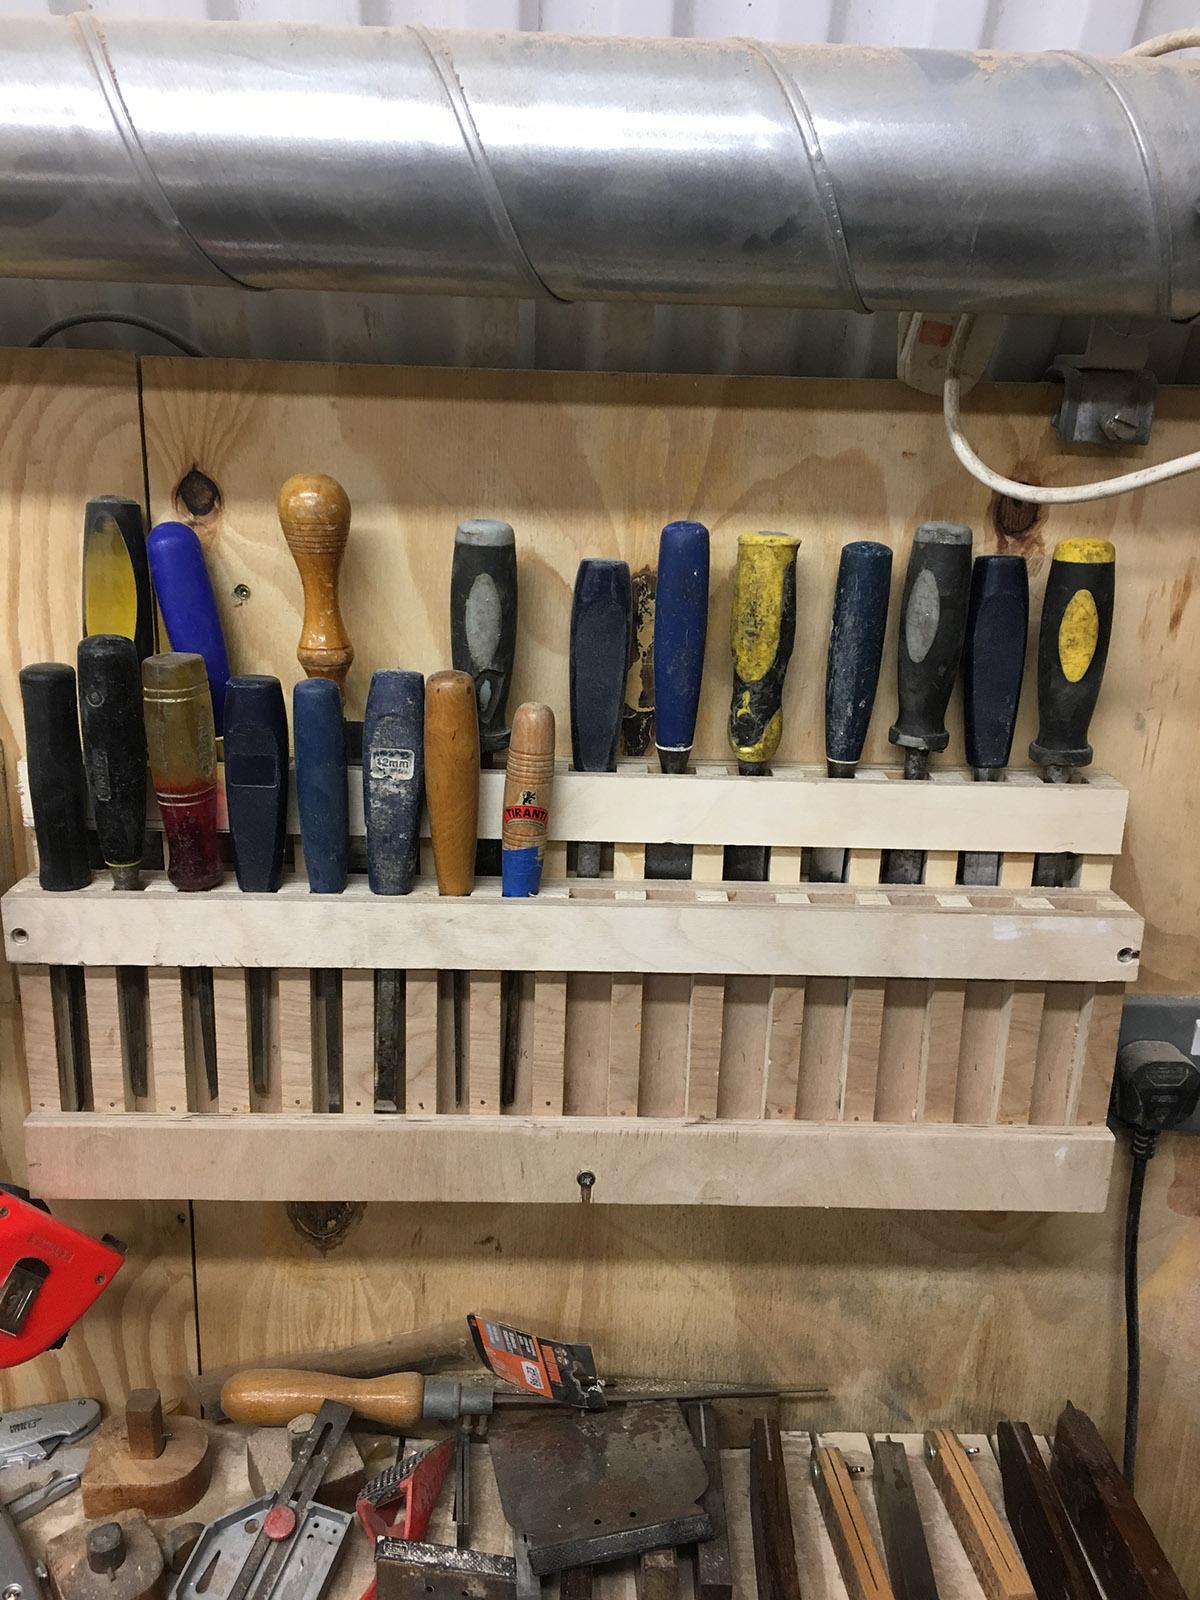
- Chisels and Gouges should be sharp enough to remove the hair from your arm
- Make sure you take control and ownership of your tool - be firm and confident
- Don’t hit your hand when striking the tool with your mallet!
- Don’t hit to hard - you’ll damage the end of your tool, and also your material
- Don’t hit too softly - you’ll never make any progress!
- Never hit a chisel or gouge with a metal hammer
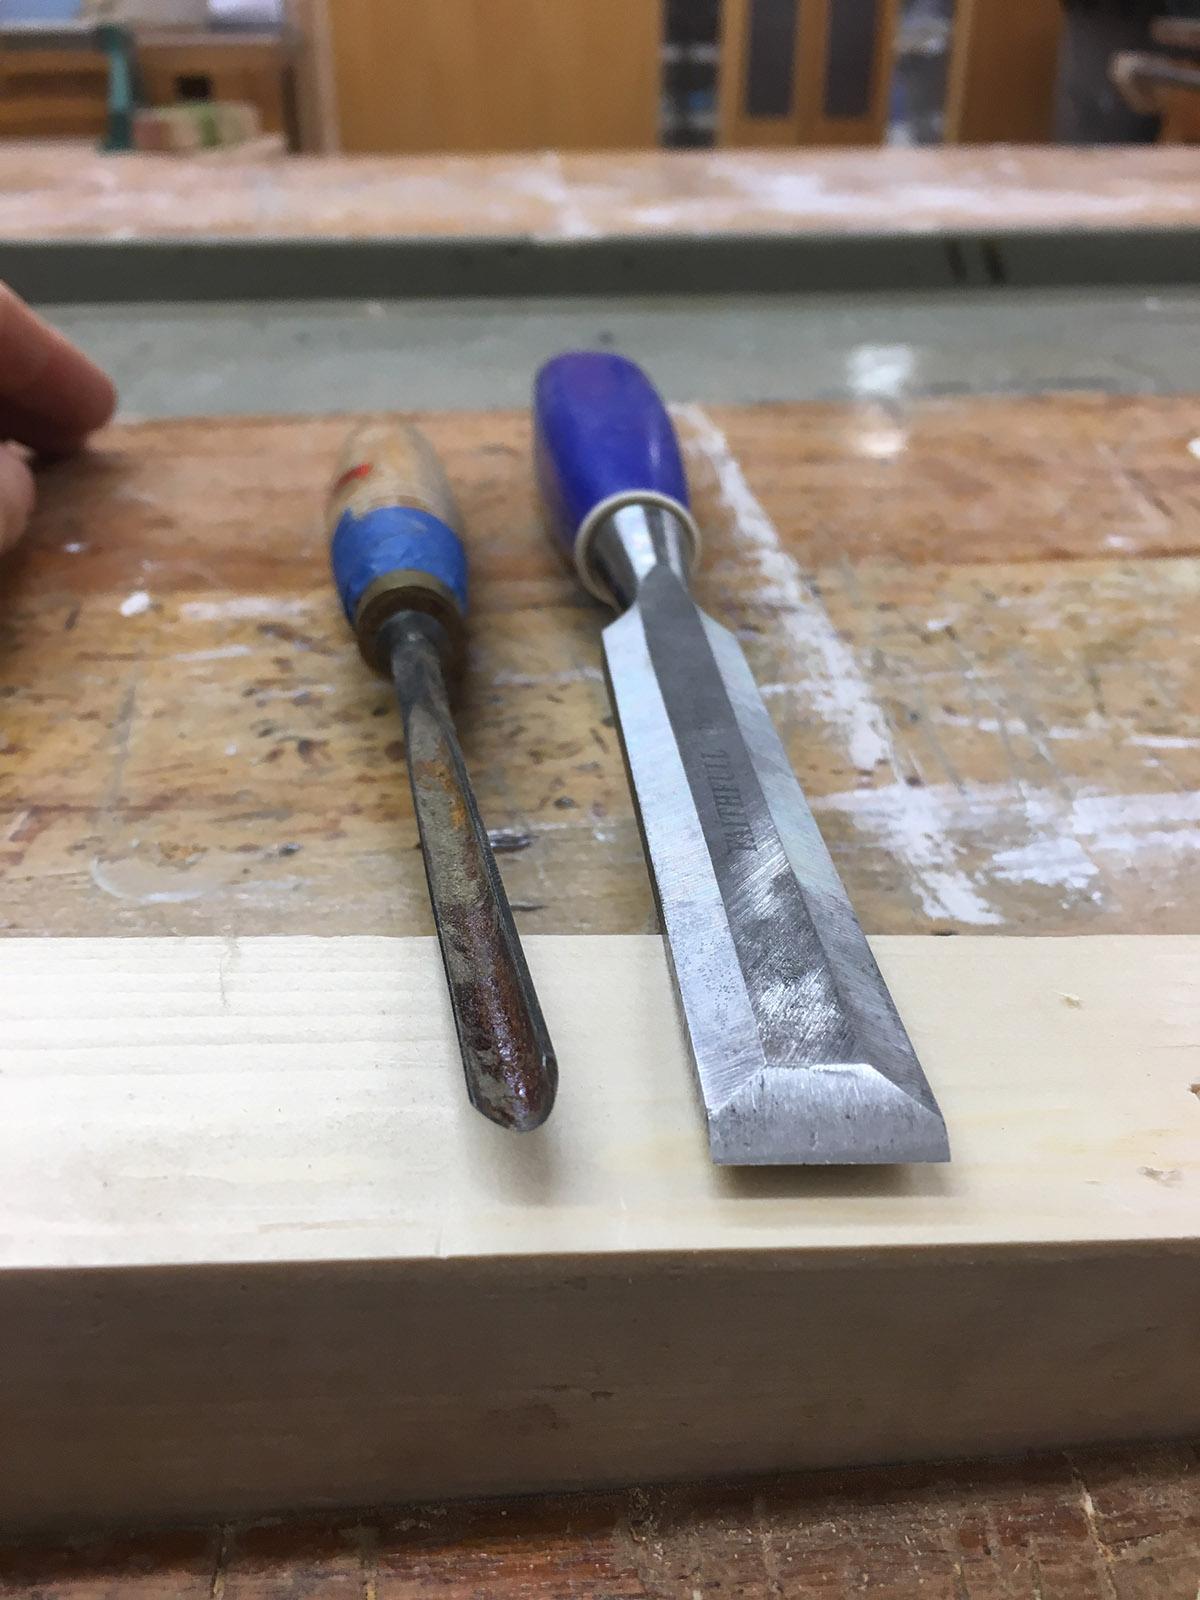
L-to-R: Gouge, Chisel
Chisel
- The end of the blade is straight
- Used to remove small precise areas of word when making joints or recessing hinges
- One side of the chisel will be perfectly flat, the other will be angled/bevelled along the tip to form a sharp blade.
Gouge
- The end of the blade is curved or V-shaped
- Used in wood carving and sculpture making
- How to use:
- First, mark out the wood you need to remove
- Make sure you feet are firmly planted shoulder width apart.
- Place the tip of the chisel on one of your marks - the flat side of the blade should be on the side of the wood that should be kept - the bevelled edge should be against the wood to be removed
- WIth the chisel perfectly straight, press down firmly, and tap the end gently with a mallet - you shouldn’t go more than a couple of millimetres
- Now move the chisel tip so that it’s a few millimetres into the wood to be removed, tilt the chisel at 45 degrees, with the bevelled edge up (and flat side down) - press/gently tap on the chisel, so that you remove a small sliver of wood. This is called “relieving the cut”
- Repeat this process all round the area you need to remove on one face of the material
- You can now repeat the process a few times so that you have slightly cut down to create the new edges you want. You can now use the chisel and mallet to start removing excess wood - either by working with the same 45 degree slant, or cutting straight into the wood from another side.
- Repeat this process until you’ve removed all the wood you need to. As you gain experience, you’ll be able to remove more wood, more quickly, without damaging your material!
Sharpening - to be updated
- Sharpening is an art form - and if done incorrectly can do damage to the tool - if in doubt, ask a woodtech!
- We also have yellow-plastic-backed diamond stones. Remember these are industrial sharpening diamonds - they will seriously mark any rings or jewellery you are wearing!
- You can use whichever sharpening system you prefer and feel most confident with.
- We have a honing guide which can hold the chisel at the correct angle for sharpening. If you prefer to use this, ask someone to show you how. Otherwise, use this freehand technique:
- You’ll need a cup of water to lubricate the diamond stone or sandpaper.
- Place the stone on a solid surface such as a workbench, and thoroughly wet - rub water all over the surface
- Place your chisel on the sharpening surface, with the flat side upwards
- Lift the handle of the chisel until you feel the bevelled edge is now completely flat against the face of the diamond stone
- Grip the chisel firmly, with your thumb pressing the tip into the diamond stone
- Now stroke firmly back, keeping the angle of the chisel exactly the same as you move - so that the bevelled edge of the chisel stays perfectly in contact with the stone
- Make several firm strokes like this - always at the right angle!
- Next, you need to remove the burr which will have formed on the back of the chisel as you sharpened it.
- Turn the chisel over, so that the flat side is downwards - but not yet touching the stone!
- Pivot the chisel so that the metal nearest the handle is touching the end of the diamond stone, and the sharp tip is pointing up slightly - now lower the tip until the back of the chisel is perfectly flat on the diamond stone.
- Ensuring that the chisel is perfectly flat, make several firm strokes back
- Feel the tip of the chisel (carefully) with a finger tip - it should be razor sharp. You may need to repeat the sharpening process several times to get a good sharp edge.
- If you think you are doing something wrong, or the tool seems to be getting less sharp, then stop and ask a woodtech!
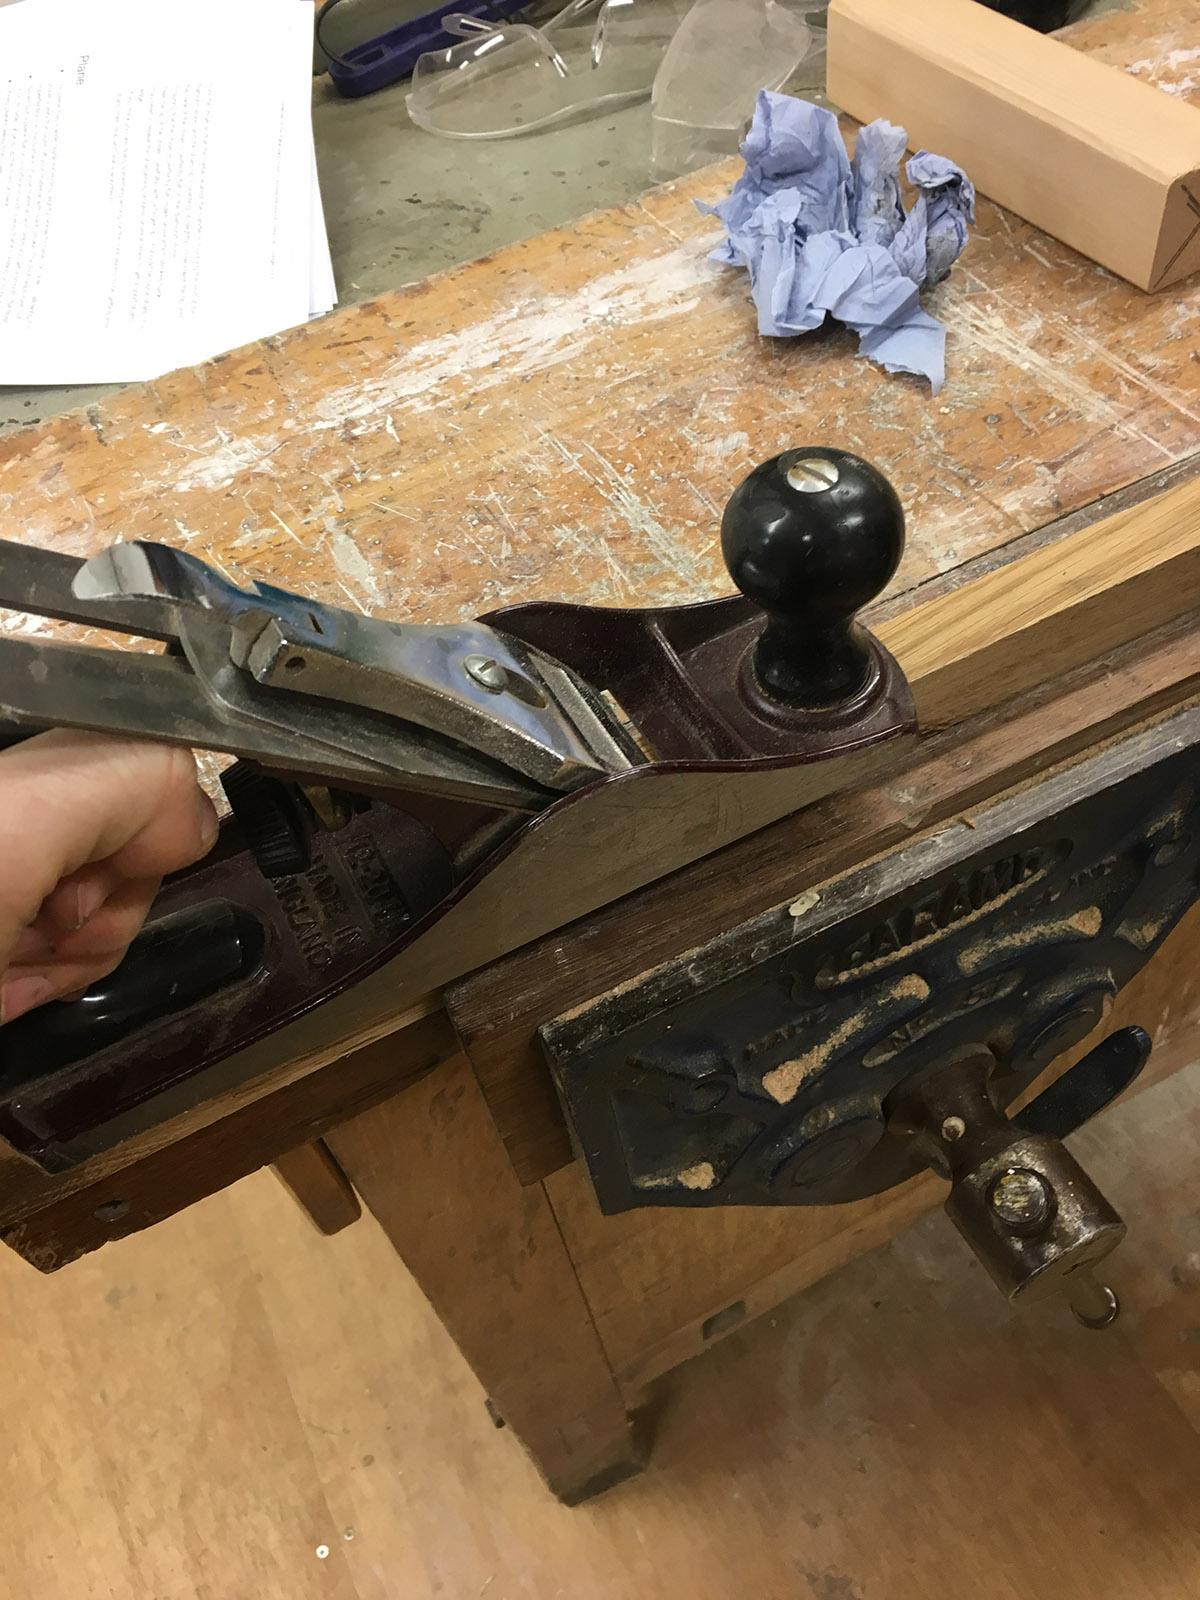
Plane

Never rest the plane directly flat on the surface as this can damage the blade.
- The plane has a wide blade extending slightly below its base (or “sole”) - allowing it to shave a very thin layer off your material with each stroke. The foot helps even out imperfections in the surface of your material, and helps you get a smooth, flat finish
- Never put a plane flat on a surface in such a way that it’s resting on its blade - either lay it on its side, or prop up the front or back.
- Keep planes away from nails, screws, or anything else embedded in your material - hitting these will ruin the blade
- Never try to plane MDF (its abrasive) or secondhand wood (can have nails, staples and other dodgy stuff in) - these will ruin the blades pretty quick.
- A plane with a longer foot will help keep the surface flatter, whilst a shorter foot is more maneuverable and can be used on smaller pieces or to get into awkward corners
- Setting the blade:
- Screws on the back end of the blade can be used to push it further out underneath the foot, or pull it back in.
- Make sure the blade is even - that it extends the same amount on both ends!
- Exposing more blade will remove more material with each stroke, but be very hard to push, and risks damaging the plane, your material, or a person.
- Exposing less blade will take a thinner shaving of material with each stroke, and be far easier to push - especially on an initially rough surface
- You want the shaving to be thin enough to unroll and read this text through!
- How to use:
- Make sure your material is held in such a way that it can’t move in the direction of your planing strokes. Depending on the size of your piece, it may be impractical to stop it moving in any direction - so beware of lateral movement.
- Make sure that you have plenty of space beyond the end of your material into which the plane can move as you finish your stroke
- Set the blade so that is projecting the right amount - around 1 millimetre
- Place the toe of the plane (the part of the foot in front of the blade) flat on your material - the blade should not be touching your material
- Get yourself in a position where you can push the plane from behind with your elbow pointing out straight behind. You want to be pushing mainly forwards, with just enough pressure down to keep the plane firmly on your material
- Make sure you are “behind” the plane, not hunched over it from the side.
- Make firm strokes along the entire length of your material, keeping the sole of the plane perfectly flat against the material at all time.
- Make sure you keep the pressure even across the width of the blade - otherwise you’ll shave more material off one side than the other
- Planing takes practice!

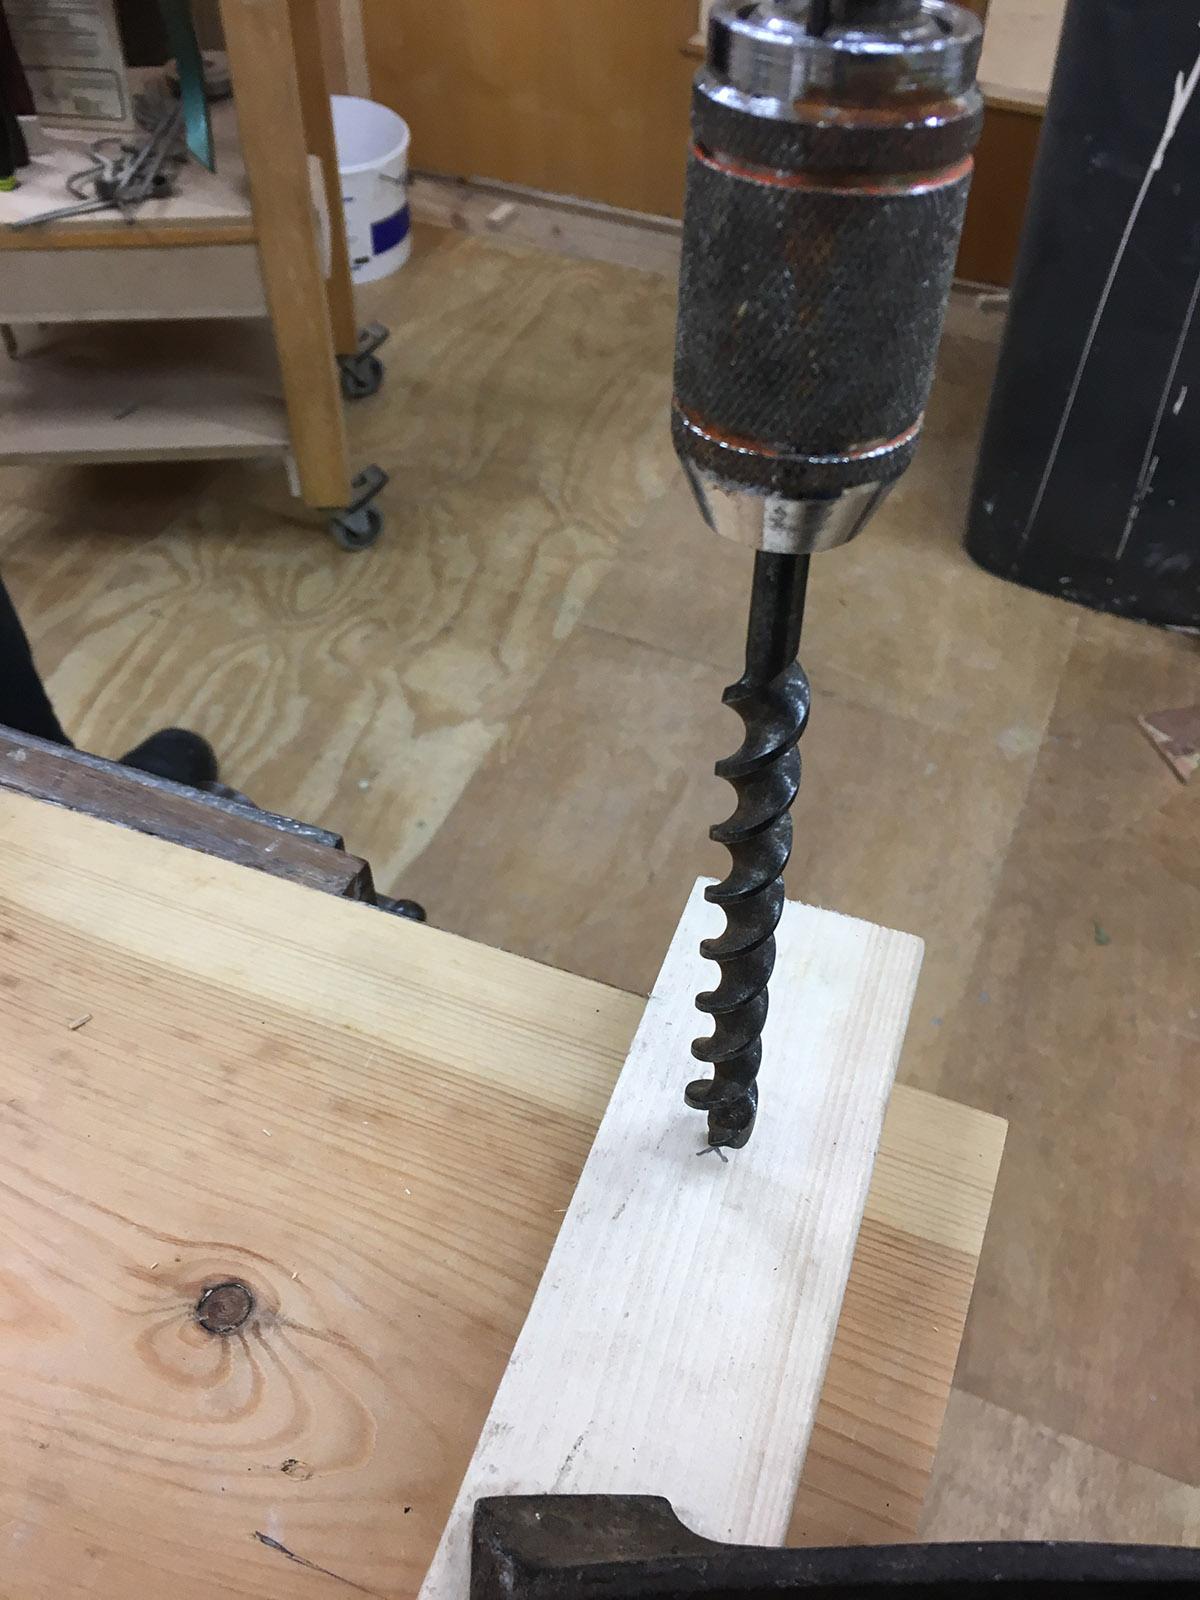
Brace and Bit - hand powered drill
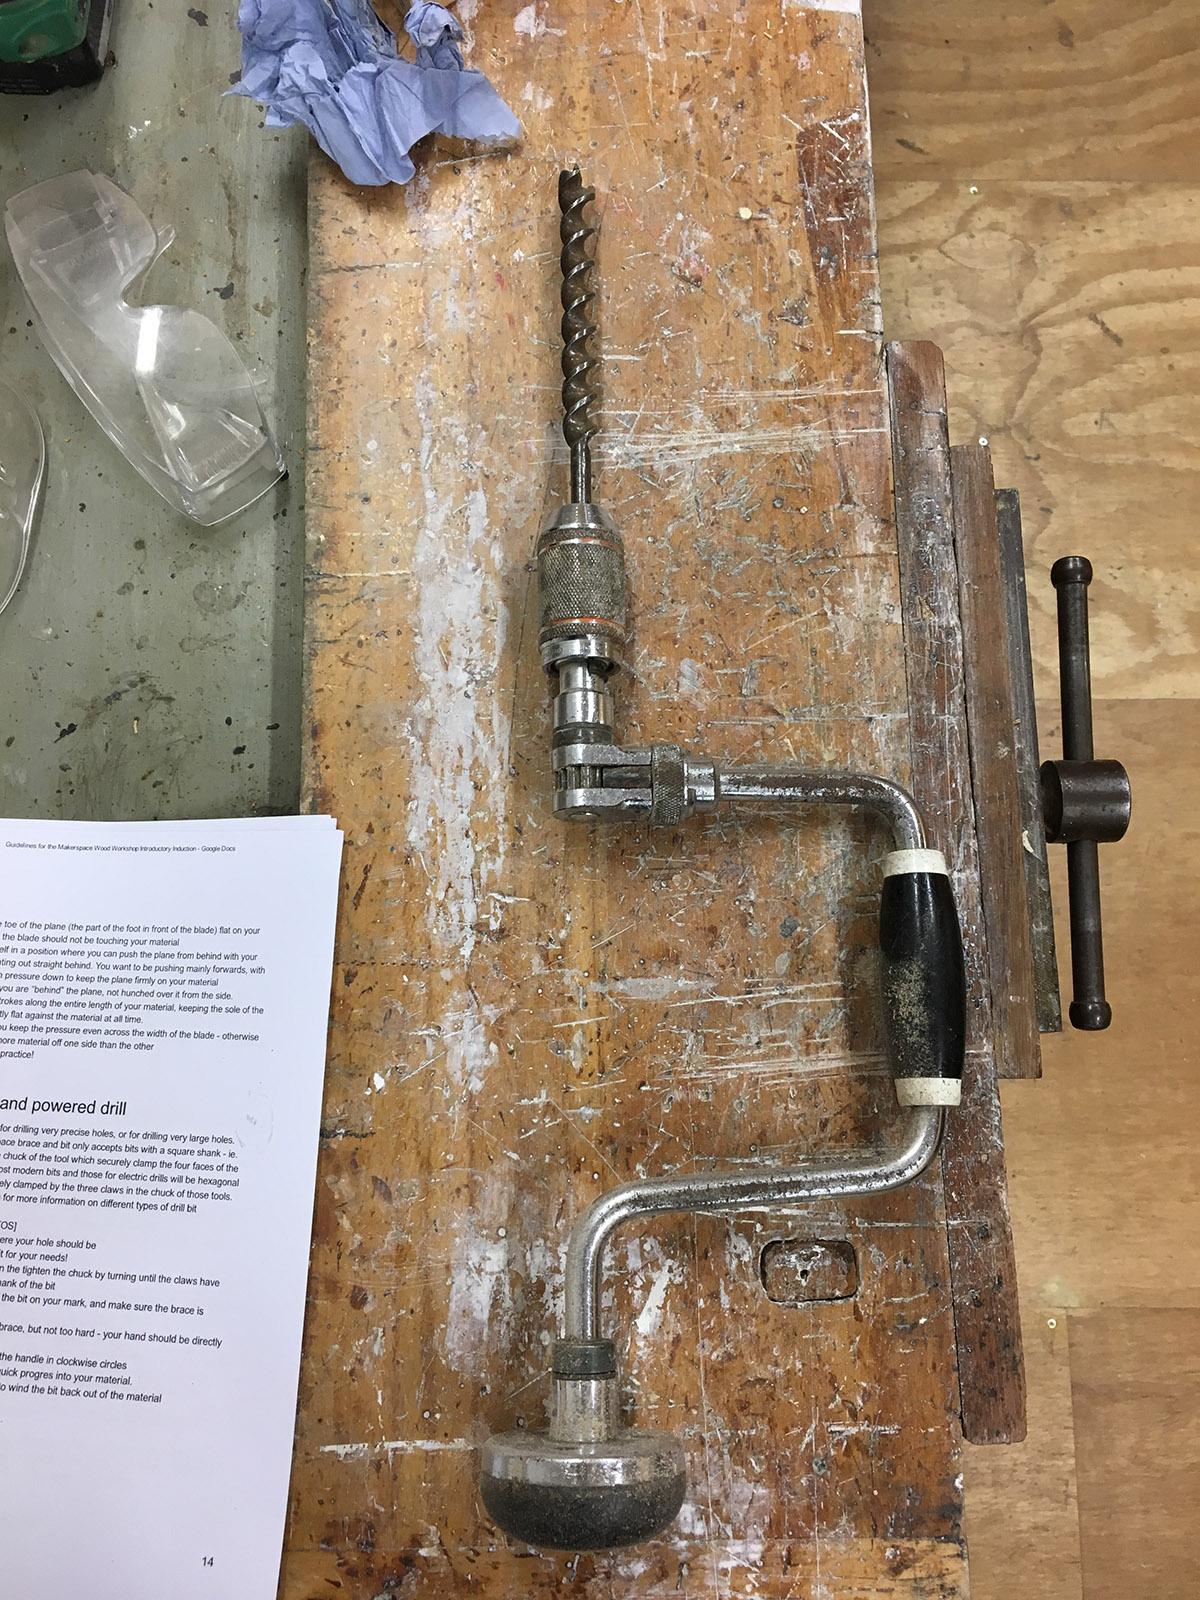
- Ideal for drilling very precise holes, or for drilling very large holes.
- The space brace and bit only accepts bits with a square shank - ie. there are four claws in the chuck of the tool which securely clamp the four faces of the drill bit shank. Note that most modern bits and those for electric drills will be hexagonal (6-sided) - which are securely clamped by the three claws in the chuck of those tools.
- See the power tools section for more information on different types of drill bit
- How to use:
- Mark the centre of where your hole should be
- Find the appropriate bit for your needs!
- Insert the bit and tighten the tighten the chuck by turning until the claws have securely clamped the shank of the bit
- Carefully place the tip of the bit on your mark, and make sure the brace is perfectly upright.
- Press down firmly on the brace, but not too hard - your hand should be directly over the bit
- With your other hand, turn the handle in clockwise circles
- This will make surprisingly quick progres into your material.
- You can turn anti-clockwise to wind the bit back out of the material